
 Pin it
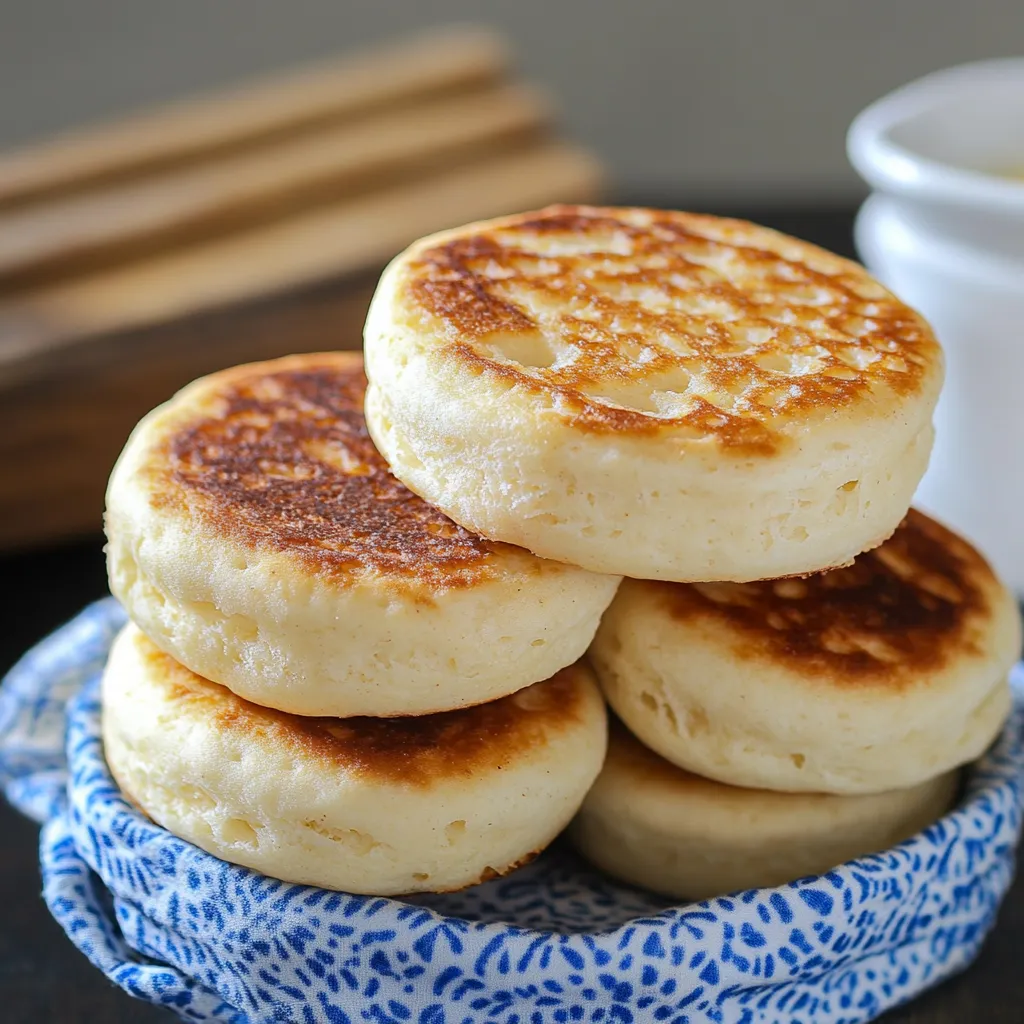
Enjoy the thrill of making super chewy, homemade English muffins with all those wonderful little holes and pockets everyone wants. These fresh ones smell way better and feel different in your mouth than what you buy at stores. The real trick is letting the dough sit and develop slowly - that's what gives them amazing flavor and creates those air bubbles we can't get enough of.
I found out how to nail English muffins at a cooking class - it all comes down to being patient and watching your temperatures. The longer they take to rise, the yummier they'll be and the better texture you'll get.
Key Ingredients and Smart Shopping Advice
- Flour: Grab unbleached all-purpose for the best outcome
- Yeast: Get fresh active dry yeast so they rise properly
- Milk: Don't skimp - whole milk makes them softer and tastier
- Butter: Go with unsalted so you can add just the right amount of salt
- Cornmeal: Pick medium-grind for that perfect outside crunch
Step-By-Step Cooking Guide
- Step 1: Get Your Yeast Working Right
- Check milk warmth on your wrist. Watch for tiny bubbles forming at the edges. Be patient until the yeast mix gets foamy. Keep everything nice and warm.
- Step 2: Work the Dough Just Right
- Stir until the dough gets stretchy. Try the window test where it stretches thin. Don't worry if it feels a bit sticky. Make sure to cover it well while rising.
- Step 3: Handle with a Gentle Touch
- Move the dough carefully to keep air inside. Use smooth, even pressure when cutting shapes. Sprinkle lots of cornmeal around. Don't crowd them too close together.
- Step 4: Cook Them Just Right
- Keep heat at medium-low. Don't push them down while cooking. Wait for that nice golden brown color. Check the middle to make sure they're done.
My grandma always told me, "You can't rush good muffins" - she taught me how important patience is when you're cooking.
 Pin it
Mastering Heat Throughout the Process
After making tons of batches, I've figured out that getting the temperature right at each stage really matters: How warm your liquid is affects how the yeast works. Your kitchen temperature changes how fast things rise. Your cooking temperature determines how they turn out. Even how warm or cold your ingredients are makes a big difference.
Prep-Ahead Strategies
- Mix your dough before bedtime
- Let it rise slowly in the fridge overnight
- Form and cook them fresh when you wake up
- Cook extra and freeze them for busy mornings
Fixing Common Problems
- When they come out too heavy, give them more time to rise
- For doughy middles, turn down the heat and cook longer
- If the bottoms get too dark, use more cornmeal and lower heat
- To get more holes inside, add a touch more water to your dough
Good-For-You Benefits
They have fewer chemicals than store versions. You pick what goes in them. They give you good energy from complex carbs. You can make them healthier with whole grain flour.
The first time my kid helped make these, she couldn't believe how the flat circles puffed up into perfect muffins. Now we don't skip our weekend muffin-making routine.
 Pin it
Through years of tweaking these English muffins, I've learned success comes from embracing each step of the process. Watching yeast work its magic, seeing how dough changes as it rises, and that amazing moment when you crack open a fresh-cooked muffin to find perfect little air pockets inside - there's nothing like it. Whether you're fixing a fancy breakfast or just slapping on some butter, these homemade English muffins will make mornings feel special.
Frequently Asked Questions
- → Why is a second rise necessary for English muffins?
- It gives the muffins their fluffy texture and special pockets for butter or jam after cooking.
- → Can I make the dough in advance?
- Absolutely! Pop it in the fridge after the first rise, then let it come to room temperature before shaping.
- → How should I open English muffins?
- Poke around the sides using a fork and pull it apart gently. This keeps the texture intact.
- → Why do my muffins overcook so fast?
- The heat might be too high. Use really low heat and cook longer to avoid burning the outside.
- → How can I keep them fresh?
- Store in a sealed container for three to five days, or freeze them for up to three months.
- → Why is cornmeal used on English muffins?
- It adds crunch and stops the dough from sticking to the skillet during cooking.