Golden French Bread

Featured in Fresh-Baked Happiness.

In only 90 minutes, this simple French bread makes two golden loaves with a crispy crust and soft texture. Use flour, water, and a few typical pantry items like yeast, salt, sugar, and olive oil. The dough is quick to shape, giving it that classic French bread vibe with no fancy tools needed. You can adjust the crust's texture to your liking, soft or crusty, and keep leftovers in the freezer for up to three months. It’s great for sandwiches, a pasta side, or warm with some butter.
A woman wearing a chef's hat and apron.
Updated on Thu, 27 Mar 2025 22:27:06 GMT
Sliced loaf of bread ready to enjoy. Pin it
Sliced loaf of bread ready to enjoy. | mecooking.com

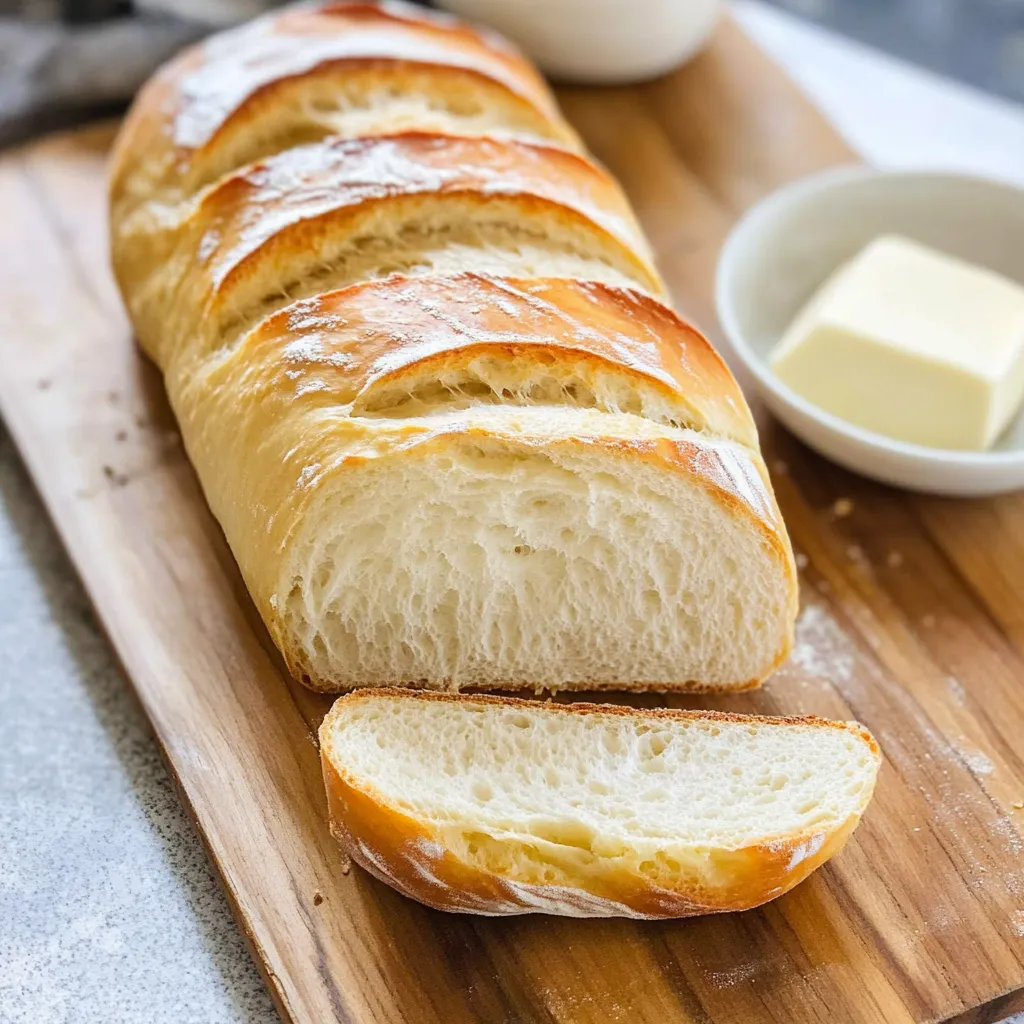
Nothing beats the smell of homemade French bread filling your home. With its crunchy outside and soft, fluffy inside, this bread makes any dinner feel special. I've spent years tweaking this 90-minute technique, and now it turns out loaves that are just as good as what you'd find at fancy bakeries.

The first loaf I ever made had my whole family standing around waiting. They tore off warm chunks and watched them steam. Their happy faces told me everything - bread you make yourself has something magical that you just can't buy in stores.

Complete Ingredients Breakdown

  • Bread flour: Contains more protein, giving you that wonderful chewy bite and sturdy outer shell that French bread needs
  • Active dry yeast: The magic starter that makes your dough rise, always get fresh packets for best results
  • Warm water: Must be around 110°F - not too hot, not too cold - so your yeast can work its magic
  • Fine sea salt: Brings out all the flavors and helps control how the yeast works, creating the perfect inside texture

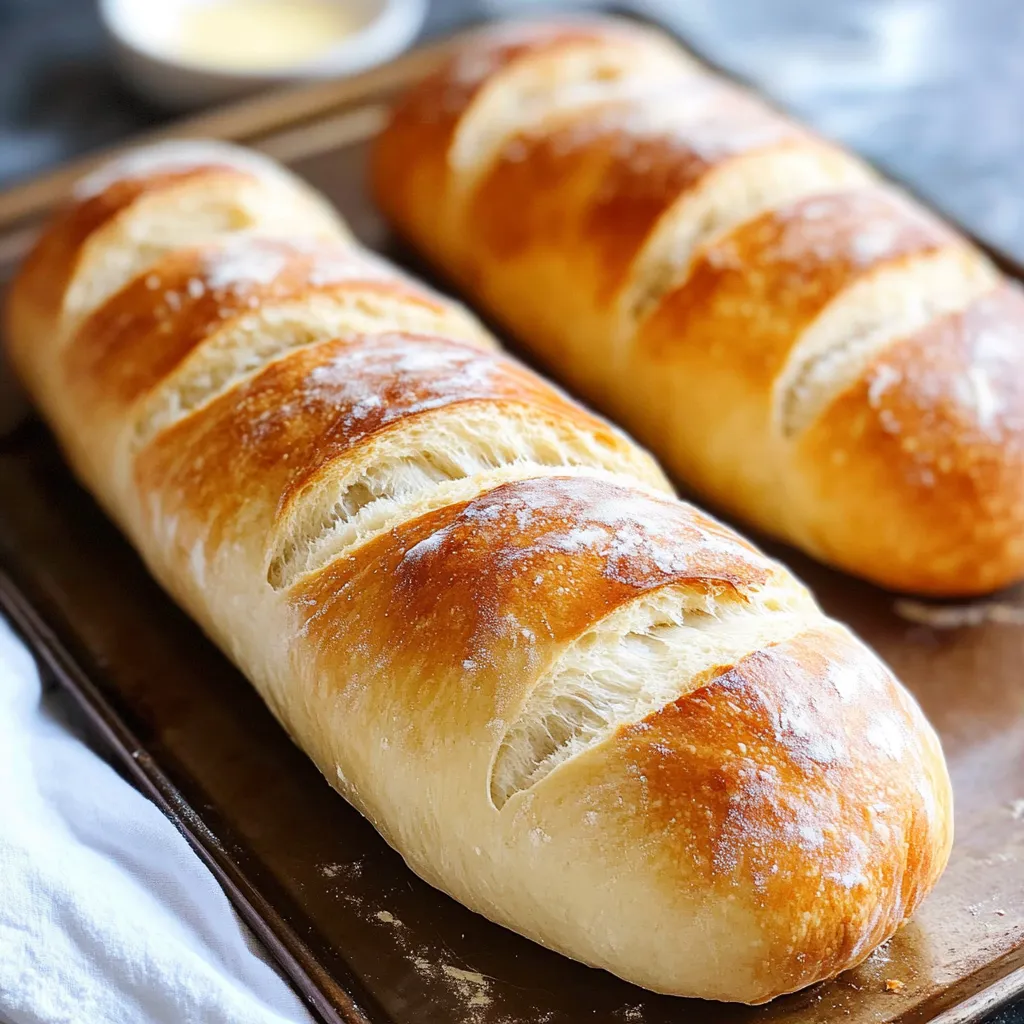
Shaping Your Dream Baguette

Yeast Preparation:
Mix your 110°F water with yeast and a tiny bit of sugar in a clear bowl. Soon you'll see it bubble up and smell that wonderful yeasty scent that means it's alive and working.
First Mix:
Add your flour bit by bit to the bubbly yeast water. Wait until each scoop disappears before adding another. You'll start to see real dough forming right before your eyes.
Working the Dough:
Push and fold with a steady rhythm, feeling the dough change under your hands. It'll go from rough and sticky to smooth and stretchy as you build up the gluten.
Creating the Shape:
Cut your dough in half and roll each piece into a long tube. Pull the surface tight as you go to make sure it rises evenly and looks like it came from a bakery.
Last Steps:
Cut slashes across the top with a sharp knife so the bread can grow while baking. Spray some water over it to help get that amazing crunchy outside.
Two loaves of bread on a tray, ready to be baked. Pin it
Two loaves of bread on a tray, ready to be baked. | mecooking.com

I remember watching my grandma knock on the bottom of every loaf she made. She taught me to listen for that empty sound inside. I still use this trick today and it makes me feel connected to all the bread makers in my family before me.

Tasty Food Matches For French Bread

Your fresh bread can become so many different meals. Cut thick slices for amazing sandwiches, dice it up for crunchy croutons, or just dip it in a hot bowl of soup. Each way of serving brings out something different about this versatile bread.

Twists On The Classic Recipe

Try mixing in some herbs de Provence for flavor, or swap in some whole wheat flour for extra nutrition. You can shape it into round loaves instead of long ones, or make tiny dinner rolls that everyone gets their own.

Storing Your Masterpiece

Keep your bread in a paper sack on the counter for a couple days to maintain that perfect crust. When it starts getting stale, just sprinkle it with water and warm it up in a 350°F oven for 5-10 minutes.

A loaf of bread is cut into slices and placed on a tray. Pin it
A loaf of bread is cut into slices and placed on a tray. | mecooking.com

After baking countless loaves over the years, I've learned that taking your time really matters. Waiting for the dough to rise fully and holding back from cutting into hot bread always pays off. This isn't just a list of steps anymore. It's about honoring traditions, mastering techniques, and enjoying the simple joy of breaking bread with the people you care about.

Frequently Asked Questions

→ Can I make French bread by hand?
You sure can! A stand mixer helps, but you can mix everything in a big bowl and knead by hand on a floured surface for 8-10 minutes until it’s smooth.
→ How do I check if my bread's done baking?
Tap the loaf's bottom—it should sound hollow! Or use a thermometer; it’s done when it reaches about 190°F inside.
→ Why didn’t my loaf rise right?
Water that’s too hot can kill the yeast, or old yeast won’t work. Make sure your water is warm (not too hot) and give your dough enough time to puff up.
→ Can I add extras like cheese to this bread?
Of course! Toss in a cup of shredded cheese like parmesan or gruyère after the first rise. For herbs, mix in 1-2 tablespoons of dried ones like rosemary or thyme.
→ How do I warm up leftover bread?
Sprinkle a little water on it, wrap it in foil, and bake at 300°F for about 5-10 minutes. It makes the crust crispy again but keeps the middle soft.

Homemade French Bread

This 90-minute French bread is golden on the outside and soft inside. Perfect for beginners with a few simple ingredients.

Prep Time
70 Minutes
Cook Time
20 Minutes
Total Time
90 Minutes
By: Mariana

Category: Breads & Muffins

Difficulty: Intermediate

Cuisine: French

Yield: 32 Servings (2 loaves)

Dietary: Vegetarian

Ingredients

→ Basic Dough Ingredients

01 1 teaspoon olive oil
02 2 ½ teaspoons table salt or fine sea salt
03 5 cups (650 g) bread flour or all-purpose flour, plus a bit more if required
04 2 ½ teaspoons regular sugar
05 1 Tablespoon active dry yeast
06 2 cups warm water (around 105°F)

→ Extras

07 Salted butter, melted (optional)

Instructions

Step 01

Combine the sugar, yeast, and warm water in a small bowl. Let it sit for about 5 minutes until it gets foamy—it means the yeast is happy and doing its job!

Step 02

Using a stand mixer with a paddle attachment or a large mixing bowl, add 2 cups of flour and the salt. Pour in the bubbly yeast mixture and stir it on medium-low. Toss in more flour, roughly half a cup at a time, until the dough feels smooth and not sticky. Depending on the day, you might use a little more or less than 5 cups total.

Step 03

Coat the dough ball lightly with olive oil so it stays soft. Cover the bowl with a kitchen towel and let it sit for 15-30 minutes. If you're not in a hurry, an hour-long rise works even better!

Step 04

Dust your work surface with flour and place the dough on it. Use a sharp knife or dough cutter to divide it into two pieces. For each half, roll it into a rectangle about 15 inches long. Starting from one long side, tightly roll it into a cylinder. Seal the seam and tuck the ends under. Shape it into a loaf and place it on a baking sheet. Do the same for the second piece.

Step 05

Cut three slashes diagonally into the tops of the loaves using a sharp knife. This not only looks cool but also helps the bread bake evenly. Cover the loaves gently with a towel and let them sit for another 30-60 minutes. A longer rise makes better loaves if you can spare the time!

Step 06

Set your oven to 400°F. Line your baking sheet with parchment paper or a silicone mat. Pop the loaves in the oven and bake until they turn beautifully golden on top, about 17-23 minutes. To test if they're done, tap the tops—they should sound hollow! If they start browning too fast, tent them with foil and lower the temperature to 375°F.

Step 07

For a richer finish, sweep melted butter over the warm loaves. Slice and eat while they’re still cozy and fresh.

Notes

  1. If you'd like a glossy, crispy crust, mix 1 egg white with a teaspoon of water and brush it on the loaves before baking. Also, tossing a few ice cubes into the oven can create steam, which makes the crust crunchier.
  2. Keep your bread fresh by storing it in a paper bag on the counter—it helps preserve the texture.
  3. To freeze, wait until the bread cools completely. Then put it in a large zip-top bag (better if unsliced) with the air squeezed out. Freeze for up to 3 months. Thaw at room temperature overnight and warm it up at 300°F for a few minutes before serving.

Tools You'll Need

  • Stand mixer or a big mixing bowl
  • Baking tray
  • Parchment paper or silicone mat
  • Soft kitchen towel
  • Knife with a sharp blade

Allergy Information

Please check ingredients for potential allergens and consult a health professional if in doubt.
  • Contains gluten/wheat
  • Butter (optional) has dairy

Nutrition Facts (Per Serving)

It is important to consider this information as approximate and not to use it as definitive health advice.
  • Calories: 92
  • Total Fat: ~
  • Total Carbohydrate: ~
  • Protein: ~