
 Pin it
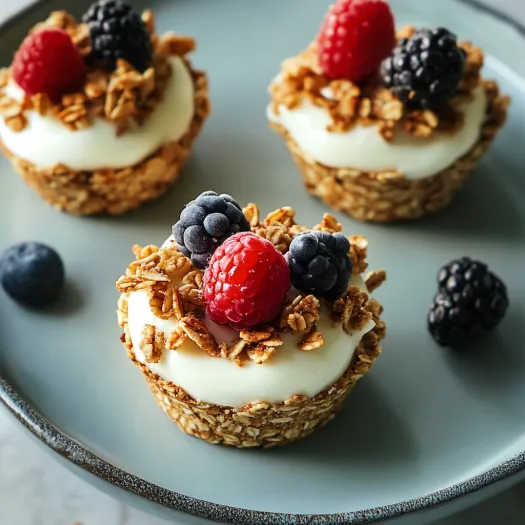
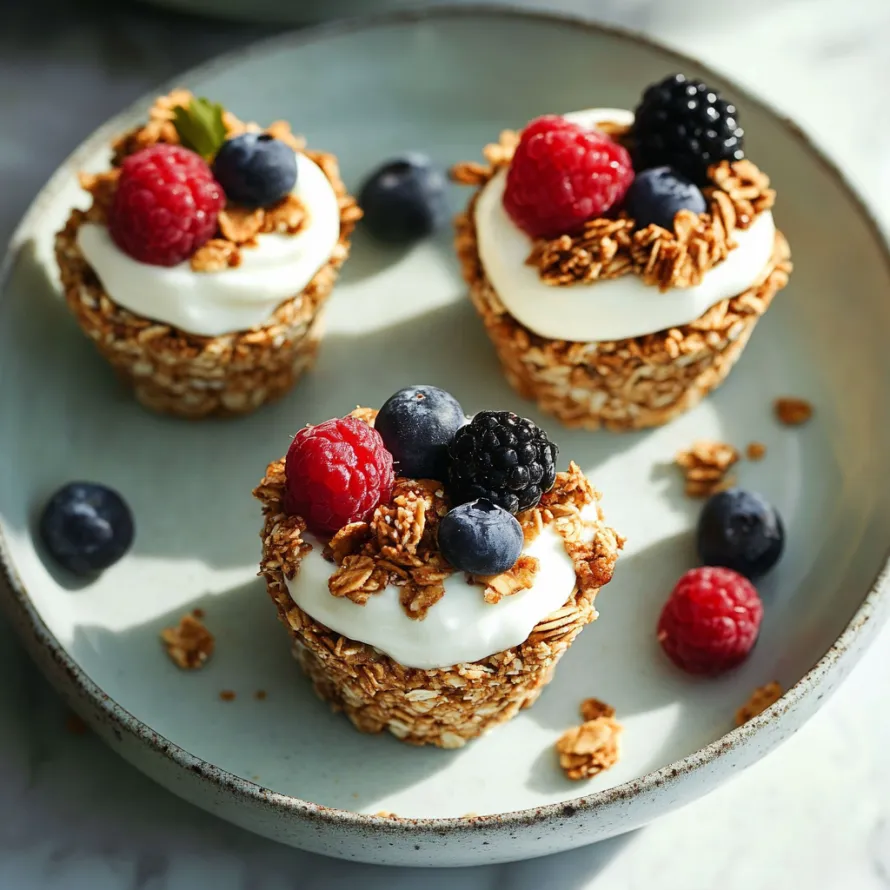
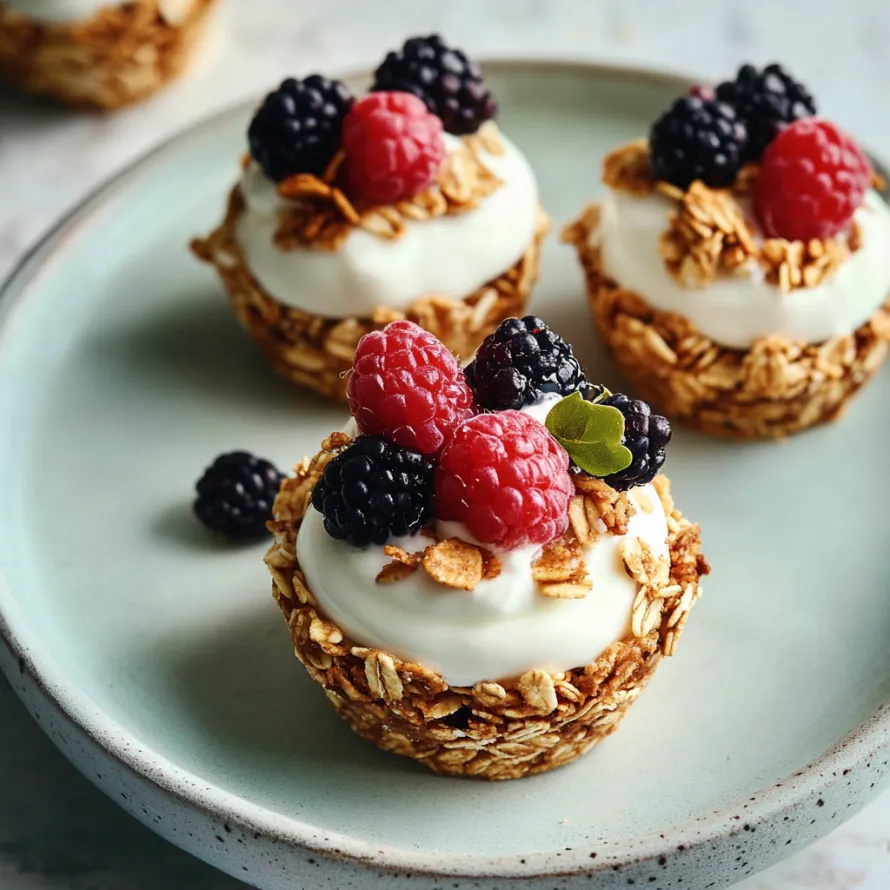
Shake up your mornings with these tasty edible granola cups that turn plain yogurt into a fun, grab-and-go meal. These smart breakfast holders mix healthy oats and simple nut butter into crunchy, easy-to-hold cups ready for smooth yogurt and colorful fresh fruit. Unlike shop-bought granola bars full of additives and too much sugar, these homemade treats have just a few good-for-you items you'll feel great about eating day after day.
I stumbled upon this idea during a super busy week when I wanted good breakfasts but couldn't spare time for morning cooking. After playing with amounts until I got the right mix of sturdiness and taste, these granola cups became my answer for healthy eating without any morning hassle.
Basic Key Ingredients
- Rolled oats: Makes up the sturdy base that gives shape and lots of fiber.
- Peanut butter: Works as the ideal glue while adding protein and good fats.
- Maple syrup: Gives natural sweetness with deep flavor hints.
- Vanilla extract: Boosts all tastes while bringing aromatic depth.
- Cinnamon: Adds subtle warmth and flavor layers.
Filling Elements
- Yogurt: Forms the smooth middle that makes granola cups a full breakfast.
- Fresh fruit: Brings bright color, natural sweetness, and important vitamins.
Easy Instructions
- Getting Your Base Ready:
- Warm your oven to 350°F (175°C) and oil a regular muffin tin.
- Making Great Cups:
- Split the oat mix evenly into six muffin spots and push firmly to make a cup shape.
- Baking Just Right:
- Cook for 12-15 minutes until slightly golden brown.
- Smart Cooling:
- Cool in the pan for five minutes, then move to a wire rack.
- Putting It Together:
- Fill cooled cups with yogurt and fresh fruit before eating.
 Pin it
Tasty Alternatives
Make chocolate fan cups by mixing in cocoa powder and using chocolate hazelnut spread. Try apple cinnamon cups with bits of dried apples and more cinnamon. Turn them into island treats using coconut butter and coconut yogurt.
Party Presentation Ideas
Set up a build-your-own cup station with different yogurt choices and toppings. Put filled cups on a stepped serving plate with fresh mint sprigs. Create tiny versions in a mini muffin tin for cute two-bite snacks.
Smart Storage
Keep empty granola cups in a sealed container at room temp for up to five days. Stick baked cups in the freezer by wrapping each one in parchment paper for up to a month. Bring back the crunch to soft cups by warming in a 325°F oven for 3-5 minutes.
Filling Ideas
Whip up berry cheesecake cups by blending yogurt with cream cheese and lemon zest. Make apple pie treats using maple-sweetened yogurt with cinnamon-spiced apples. Build tropical sunrise cups with layers of mango yogurt topped with passion fruit.
I found out how important proper cooling is when making these cups for a morning get-together. Hurrying the process made the yogurt melt and created soggy bottoms. Now I always make them the night before, guaranteeing perfect texture and looks.
 Pin it
Closing Thoughts
Quick granola yogurt cups offer an uncomplicated yet yummy way to have a good breakfast or snack. Whether you're rushing on a busy morning or taking it slow at brunch, these mix-and-match cups bring flavor, nutrition, and ease to your day.
Frequently Asked Questions
- → Can I swap peanut butter for another kind?
- Yep, you can! Almond or cashew butter both work great for different textures and flavors. If you're avoiding nuts, sunflower butter or tahini make perfect replacements. Just keep the consistency close to regular peanut butter so everything binds well.
- → How should I store these if prepping ahead?
- After baking, keep the unfilled granola cups in an airtight container. They'll last about 5 days at room temp or 3 months frozen. Don’t add yogurt or toppings till you’re ready to eat, so the cups stay crisp. If traveling, pack yogurt separately and combine it on the spot.
- → Can I make these gluten-free?
- Sure thing! Just use certified gluten-free oats to avoid cross-contamination. The rest of the ingredients should naturally fit a gluten-free diet, so it's an easy tweak for anyone who needs it.
- → Which type of yogurt should I use?
- Any yogurt works! Greek yogurt is thick and high in protein, but regular yogurt adds a smoother texture. Plant-based options like almond or coconut yogurt are great for vegan cups. For sweetness, go flavored, or stick to plain and top it with fresh fruit.
- → Why did my cups fall apart when I removed them?
- If they crumbled, the mix might've needed more peanut butter or a longer bake. Make sure the peanut butter is well-combined and smooth. Also, cooling them in the pan for at least 5 minutes is key—they firm up as they cool. Adding a touch more syrup or nut butter can help too.
- → Can I mix in other ingredients?
- Of course! Toss in extras like chopped nuts, seeds, dried fruit, or chocolate chips before baking. Just don’t add too much—start with a quarter cup, so they still hold together well. Adjust as needed in your next batch.