
 Pin it
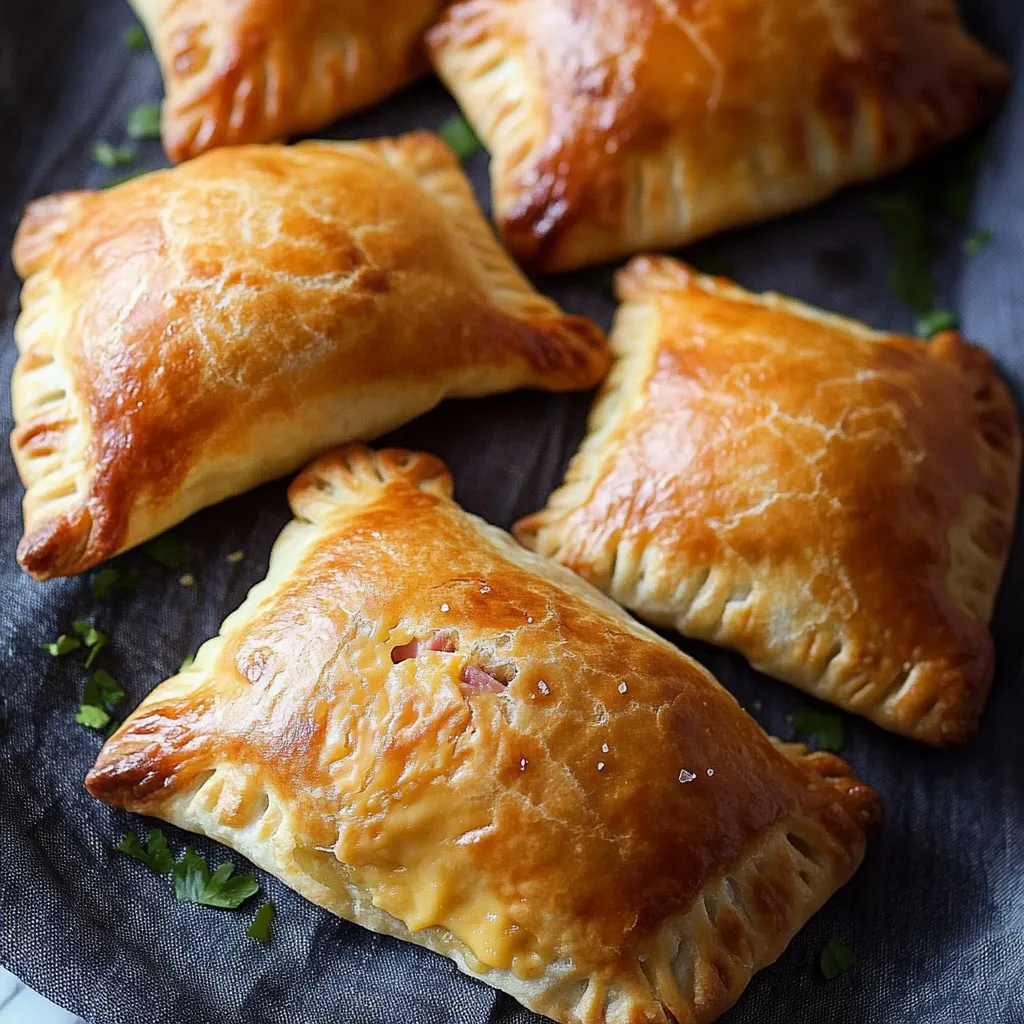
Whip up tasty hand-held ham and cheese bundles right in your kitchen! The joy comes when soft, flaky dough wraps around gooey cheese and juicy ham, then turns golden brown in the oven. When you make these yourself, you pick what goes in them and get that awesome feeling of creating something yummy from basic ingredients.
I brought these to my grandson's soccer games last week. The kids gobbled them up between matches, and I couldn't keep the other parents away! They all wanted to know how to make them. There's something special about seeing hungry kids enjoying food you've made yourself.
Fantastic Ingredients Essential
- Yeast: Get fresh active dry yeast for good rising. Keep it somewhere cool and watch those dates—old yeast won't work well.
- Warm Water: This really counts! Too hot will kill the yeast, too cold won't wake it up. Go for water that feels nice on your wrist, like bathwater.
- Unbleached All-Purpose Flour: This stuff has more protein than the bleached kind, so your dough will hold together better without getting tough.
- Extra Virgin Olive Oil: Gives a nice taste and makes everything softer. The first-pressed kinds taste best.
- Cheese: Medium or sharp cheddar melts so nicely and has great flavor, but try provolone or Swiss if you want something different.
- Ham: Go for naturally cured ham without weird stuff added. Thicker pieces work better and won't get rubbery while cooking.
Making Fantastic Pockets
- Wake Up Yeast:
- Mix yeast with water at about 105°F. Wait for bubbles to form—that means your yeast is good to go. This step makes sure your dough will puff up properly.
- Start Your Dough:
- Pour flour bit by bit into your bubbly yeast, adding olive oil, sugar and salt too. The sugar feeds the yeast while salt keeps it from going crazy. Mix until everything clumps together.
- Work The Dough:
- Knead everything on a floured counter until it feels smooth and stretchy. Good kneading builds the structure that makes your pockets chewy in just the right way. The dough should bounce back when you poke it.
- Cut It Up:
- Chop the dough into eight same-size pieces with a knife or scraper. When pieces are the same size, they'll cook evenly and hold the same amount of filling. Let them sit a minute before you shape them.
- Roll Them Out:
- Flatten each piece into a rectangle about 6 by 4 inches, keeping the thickness the same all over. Even thickness stops weak spots where the filling might leak out.
- Add Filling:
- Put ham and cheese on half of each flattened piece, but leave a half-inch empty space around the edges. This empty space is where you'll seal everything shut.
- Close Them Up:
- Fold the empty half over your filling and press the edges down with your fingers, then press with a fork. Good sealing keeps all the yummy stuff inside and makes those classic fork marks everyone likes.
- Brush With Egg:
- Paint the tops with beaten egg mixed with a spoonful of water. This makes them turn beautifully brown and helps any seasonings stick.
I just love how flexible ham is in these pockets. My hubby was raised on a farm where they made their own ham, and he says these taste just like his mom's cooking. That mix of sweet, smoky ham with tangy cheese brings back memories with every bite.
 Pin it
Smart Baking Tricks
Getting your oven hot enough before cooking is super important. Set it to 375°F so the pockets brown slowly while the inside gets hot without burning the outside. Put the rack in the middle where the air moves best. Don't just watch the clock—look for that golden brown color since all ovens heat a bit differently.
Great Foods To Serve With
These tasty pockets go great with a simple green salad with tangy dressing to balance out the rich cheese. When it's cold outside, try them with tomato soup for that comfort food feeling we all love. If you're packing lunch or heading to a picnic, toss in some fresh fruit and maybe a little container of honey mustard for dipping.
Switching Up Flavors
Try Different Cheeses: Go for pepper jack if you like it spicy, smoked gouda for rich flavor, or mild mozzarella for the kids. Each kind melts differently and changes the taste while still giving you that gooey middle everyone wants.
Throw In Some Veggies: Try cooked mushrooms, browned onions, or spinach along with the ham for extra nutrients and flavor. Just make sure to cook the water out of them first so your pockets don't get soggy.
Change The Meat: Swap in chopped chicken, turkey, or even meat-free options like tempeh. Add herbs with chicken or curry powder with chickpeas to make everything taste even better together.
Storing Your Extras
Keep Them Cool: Put cooled pockets in sealed containers with parchment paper between layers so they don't stick together. Eat them within three days for the best taste and texture.
Freeze For Later: Wrap each pocket in plastic, then put them in freezer bags with the air pushed out. Write the date on them. They'll stay good for about three months before they start losing quality.
Heat Them Up: Warm refrigerated pockets in a 300°F oven for 10 minutes instead of using the microwave—they'll stay crispy that way. For frozen ones, let them thaw in the fridge overnight then heat them, or cook from frozen at 325°F for about 20 minutes until they're hot all the way through.
 Pin it
These pockets show why it's worth making food from scratch. My grandma always said that putting love into cooking changes how food tastes. Even after cooking professionally for years, I think she was right. When you bite into these pockets, you're not just tasting ingredients—you're tasting care, attention, and the joy that comes from feeding people something really good.
Frequently Asked Questions
- → Can I store these in the freezer?
- Definitely! Once cooled, wrap each one in foil and stash them in the freezer. Reheat by microwaving for 2-3 minutes or baking at 350°F for 20 minutes straight from frozen.
- → How much rise time does the dough need?
- Let it sit at room temperature for 1-1.5 hours until it gets to double its size. If you’ve got time to spare, refrigerate it for 8-12 hours for better flavor.
- → Can I switch up the fillings?
- Sure! Go for other cheeses, meats, or even veggies. Just keep the fillings dry to prevent sogginess.
- → Do I need a mixer to make these?
- Nope! While a stand mixer helps, you can mix with a spoon in a big bowl and knead it yourself on a floured surface.
- → What’s the sign my dough is kneaded fully?
- You’ll know when it’s soft with a sticky touch and springs back when you press it. For a fun test, stretch a bit to see if light passes through before it tears.